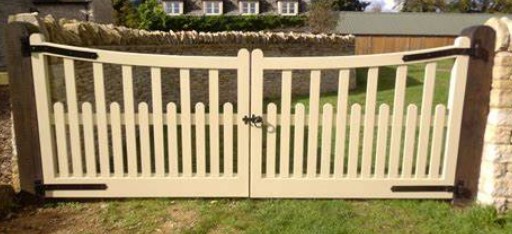
If you want to have more privacy in your backyard or anywhere else on your property, you probably need to install a gate. Maybe you already have a fence or stone wall, but people can still easily walk onto your property without any notice because of that one opening.
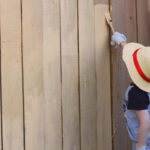
Building a cedar wood gate is both an easy and reliable solution for maximizing your privacy. All you need is some materials and a few tools to get the job done. However, you will need an assistant to help you towards the end, so ask a buddy to come over for an afternoon of fun!
Nowadays, more than ever, people are more protective of their property and belongings. And to be perfectly honest, they should be! You work hard for the things you have, and wanting to protect them is only natural.
Plus, an enclosed area allows you to sit comfortably in your own backyard without worrying about who is going to show up uninvited. Installing a gate not only offers security but also adds an incredible ambiance to your atmosphere.
If you or somebody you know is handy and has some good woodworking skills, you can actually build your own wooden gate and save some money. Below we will provide you with the steps to quickly build your own backyard gate. Let’s get started!
Step By Step Guide For Building Your Own Wooden Gate
Before you head to the store to get all your supplies, you’re going to want to have a plan in place. We suggest you check any local building codes in reference to the height allowed for fences and gates where you live.
You might want an 8-foot gate because it sounds great, but your local building codes could actually be capped at six feet. So, it’s imperative to know upfront what size you are allowed to have for a gate on your property.
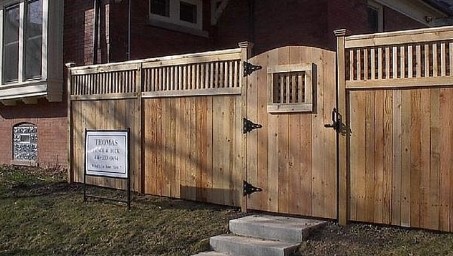
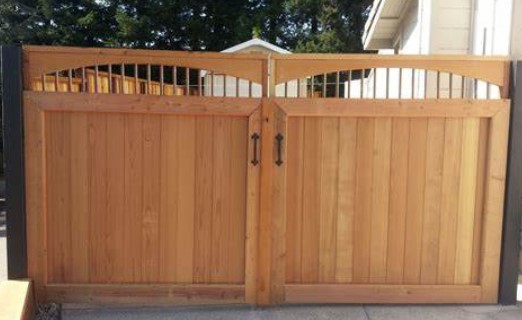
For the purposes of this how-to guide, we’re going to give you the instructions for building a gate that is 42 inches wide and six feet tall. This is the most common size used, but you can always scale the gate width as needed, either up or down, for the perfect fit.
Next, you’ll want to make a list of supplies needed to build the perfect wooden fence.
Materials Needed
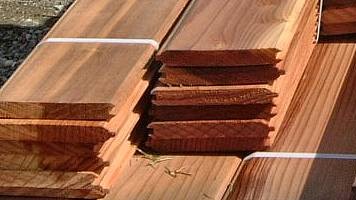
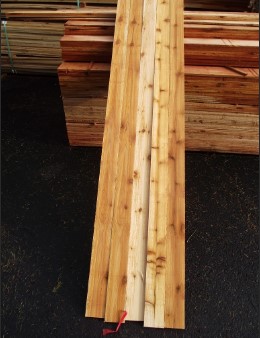
- 12 Cedar Tongue ; Groove Boards (¼” x 3½” x 96”)
- 3 Additional Cedar Boards (¼” x 6” x 96”)
- 3 Hinges, Preferably Decorative Black w/Matching Screws (13” to 17” in Length will Work)
- 2 Long Slide Hatches w/ Matching Screws (Black)
- 1 Heavy Duty Gate Flip Latch w/Matching Screws (Black)
- 1 Pkg of Galvanized Nails (⅜” Long)
Tools / Equipment Needed
- Pencil
- Ruler (Straight Edge)
- Measuring Tape
- Hammer
- Miter Saw
- Cordless Drill
- Carpenter’s Glue (Professional Strength)
Wooden Gate Step By Step Instructions
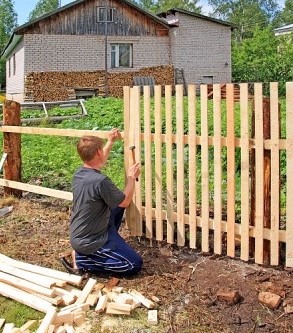
Once you have all your tools and materials, you are ready to start building your wooden gate. The following steps should be followed precisely as outlined in order to get the desired end result.
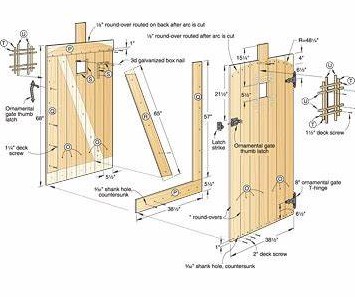
Step 1 – Prepare the Tongue ; Groove Boards
You will need to measure and cut your tongue ; groove boards to the proper sizes. Take your measuring tape and use your pencil to mark the 72” spot on each plank. Next, use your miter saw to cut each board to 72 inches long.
Step 2 – Prepare the Horizontal Cedar Wood Braces
You will now need to measure and cut the three additional cedar boards into the gate’s horizontal braces (cedar boards without the tongue ; groove). Use your measuring tape on two of the three 6” wide cedar boards to measure three 42” segments. You should have three 42” boards in length when you are done cutting.
Step 3 – Prepare the Boards for Building the Gate
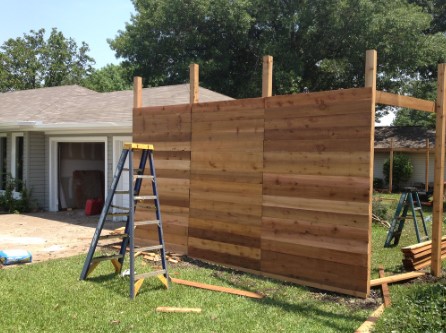
You’ll want to make sure you have a flat surface to work on that is level. Typically your driveway, patio, or garage floor is an ideal working space. Place the three 6” wide boards you just cut on the floor. You’ll want to set them parallel to each other and make sure they are 5 feet apart.
Place the third 6” wide board that you didn’t cut parallel to the other two and directly in the center between them. Next, place the tongue ; groove boards on top of the cedar boards lying on the ground. Begin tapping each board’s tongue into the groove of the next board and continue until all the tongue ; groove boards are connected together.
Check to make sure the 6” wide boards underneath didn’t get moved during the process. If they did, readjust them back to their former position while holding the tongue ; groove boards in place. Once all the boards are connected, and the underlying cedar boards are aligned, you can move on to the next step.
Step 4 – Secure the Tongue ; Groove Boards
Now, you need to attach the tongue ; groove boards with the ⅜” galvanized nails to the 6” wide cedar boards underneath. Be careful that those boards on the bottom don’t move while you hammer the nails into both boards. If they do, you need to put them back in their original place and continue securing all the tongue ; groove boards.
Step 5 – Cut Your Diagonal Brace
Next, you are going to measure and cut the diagonal brace for your wooden gate. To do this, you need to carefully turn over the gate so that the tongue ; groove boards are now facing the ground. Go ahead and diagonally lay the last 6” wide cedar board across the horizontal braces.
You are going to temporarily put some nails into the diagonal cedar board just to hold it in place. So be sure not to hammer them in all the way; make sure you can easily remove them after this step. Then use the straight edge ruler on top of your diagonal brace, being sure to keep it parallel with all the lines of the horizontal braces.
Step 6 – Prepping Your Diagonal Brace
Take your pencil and mark six spots on the diagonal brace parallel to the bottom and top of all the horizontal braces. Once that is completed, go ahead and remove all the temporary nails. You can now cut your diagonal brace with the miter saw according to the six spots you marked with your pencil.
The three pieces you have leftover from cutting can be discarded or used for another project when you are done building your gate. However, keep the other two of the cut pieces for finishing the diagonal brace.
Step 7 – Attaching the Diagonal Brace
Use the carpenter’s glue to make a line on the backside of two of the wooden diagonal braces. Next, press these two wood pieces into place on your wooden gate; they should fit perfectly between the horizontal braces.
You should place something heavy on top of the braces so that the glue can set and dry. You could use bricks, cylinder blocks, rocks, or any other heavy objects. Keep in mind that you’ll need to allow the glue to dry for a couple of hours before finishing the project.
Once the bond has had sufficient time to dry, go ahead and turn the gate back over. You can now use the ⅜” galvanized nails to attach the diagonal brace pieces into their designated place.
Step 8 – Aligning the Wooden Gate
At this point, you are going to need another person to help you finish your wooden gate. First, take the gate to the location where you are planning on installing it. Go ahead and put it into place, and use the leftover scrap pieces from earlier to support it while you mount it.
You’ll want to leave enough clearance at the bottom of the gate so that it can easily open and close once it is fully installed. Typically, leaving about a half-inch will be sufficient unless you have landscaping that will interfere with the flow of the door.
You’ll also need to leave approximately ¼” space on the side of the gate where the hinges will be attached. Take your time to get this aligned correctly so that you don’t have to go back and redo it afterward because it wouldn’t open or close correctly.
The person who is helping you should be able to hold the gate in place while you figure out the measurements needed for the space on the bottom and sides.
Step 9 – Mounting the Wooden Gate
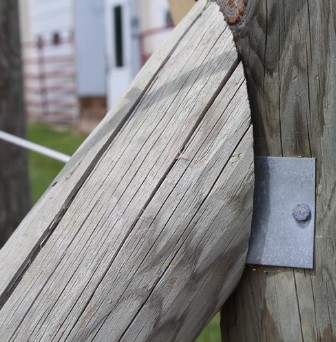
Grab your cordless drill, the hinges, and the screws that came with them. You’ll need to screw the hinges into place at the bottom, middle, and on the top of the gate. You’ll also need to attach them to the gate frame as well.
Just be sure to check and see that your wooden gate is swinging correctly before tightening all the screws. You may need to adjust one or more of the hinges if the movement is not correct. This can easily be done by leveling the hinges and loosening or tightening some of the screws.
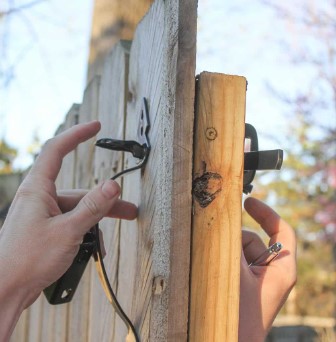
Step 10 – Attach the Latches
Lastly, take your cordless drill, the latches, and the screws that were included. You’ll need to screw the slide latches into place on both the bottom and the top of your wooden gate.
Next, screw all the receiving sections onto the wooden gate frame. Now you can mount the gate latch in the same way in the center of your wooden gate.

FAQs
Why Use Cedar Wood for Your Gate?
Cedar is one of the most durable and resilient woods that have been proven to withstand a lot of wear and tear caused by various weather elements. A nice cedar fence can provide both beauty and privacy to any home.
They are also considered low-maintenance; however, you will need to do some preventative care measures to keep your cedar gate in good condition. Typically, regular cleaning and some general maintenance will be necessary to preserve your cedar wood gate.
When cared for properly, a cedar wood gate will remain both visibility attractive and structurally sound for many years, making it the perfect addition to any landscape.
Should You Apply a Waterproof Sealer on Your Cedar Gate?
Yes, if you want your cedar gate to last a long time, you should apply a waterproof sealer to extend the life of your gate. When you use a waterproofing sealer on a cedar gate, you are essentially protecting the wood from cracking, splintering, and warping due to the various weather conditions and elements.
We suggest using a paintbrush to apply two thin coats of waterproofing sealer. You’ll need to allow the first coat of sealer to dry completely before applying the second coat. Once you’ve done this, you’ll only need to repeat the process again in about three to five years.
Tip: Make sure that your sprinklers are not facing or directly hitting your cedar gate on a regular basis. It’s unavoidable to prevent rain from hitting it, but you don’t want excessive amounts of water constantly hitting your cedar gate.
Can Cedar Wood Get Mold or Mildew Stains?
Yes, all wood can get moldy or have mildew stains over time due to all the different weather elements. This is entirely normal; however, be sure to remove any mildew or mold stains immediately when you see them.
Unfortunately, both mold and mildew can eat away at the cedar wood if not treated within a timely manner. Just mix 4 ounces of oxygen bleach with one gallon of hot water in a good-sized bucket. Then use the solution to scrub the mildew and mold from your cedar fence using a scrub brush with stiff bristles. Afterward, quickly rinse your gate with regular water.
Conclusion
Building your own wooden gate is an excellent DIY project for somebody who is handy and doesn’t mind spending an afternoon doing all the work. Just make sure you have a family member or friend to help you get it installed!